Enable Logging
Overview
Logs can be recorded from the Arm Cortex-M33 core and accessed in Linux (running on the Arm Cortex-A55 core). These logs contain debug information outputted by the firmware during inference execution. This includes pure inference timings recorded by TFLite Micro that provides an execution breakdown for each operator.
Warning
The logs are disabled by default as it impacts inference performance.
Environment Setup
Note
The procedure documented in this page is executed in a Windows environment. If using a different OS (e.g. Linux) to run e2 studio, the appearance may look slightly different from the following screenshots but the same steps still apply.
-
Download
e2studioinstaller on the Host PC from Renesas RZ FSP GitHub releases page. -
After opening the page, locate the installer named
setup_rzfsp_v4_1_0_e2s_*in the Assets section.- Windows: file ending in
.exe. - Linux: file ending in
.run.
- Windows: file ending in
-
Once the installer has been downloaded, run the file on the Host PC.
- On the setup page, please select
GNU ARM Embedded 13.3-Rel1forGCC Toolchains && Utilities.
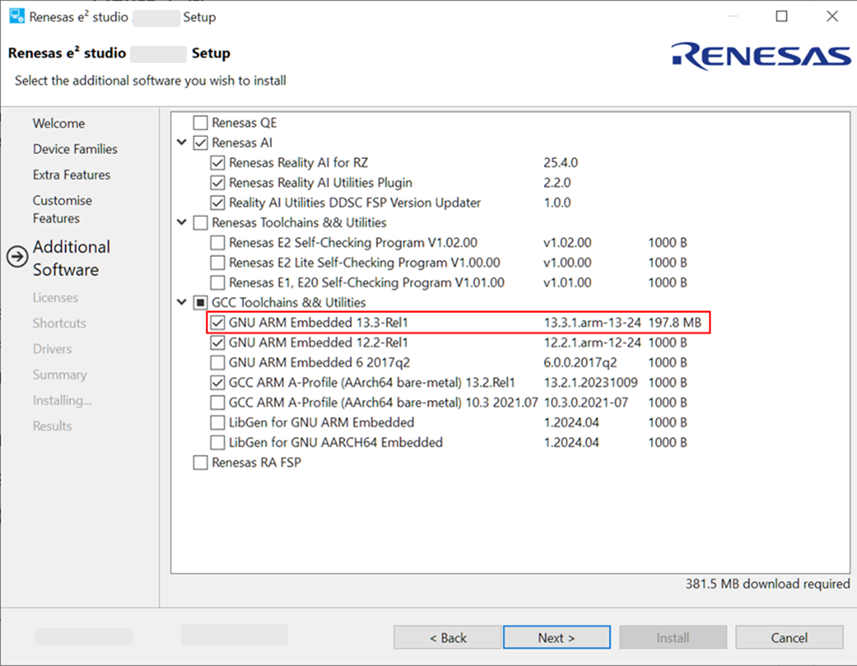
e2studio Setup Page - On the setup page, please select
-
Once the installation is completed, open e2studio.
-
Go to
File -> Import, then selectExisting Projects into Workspaceand clickNext.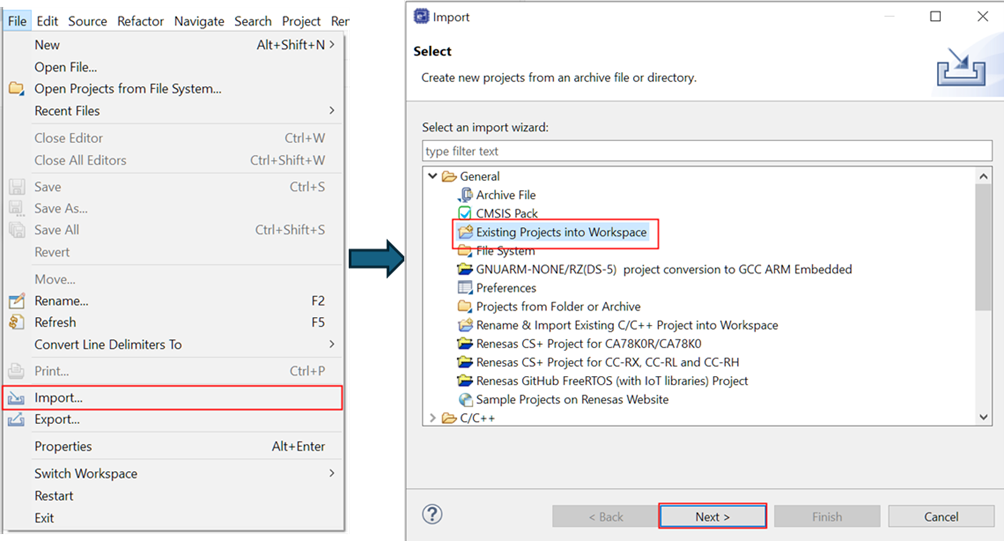
e2studio Import Page -
Check the
Select archive fileoption and enter the path toe2studio_rzg3e-ethos-u-firmware_cm33_project.zipfile ensuring the project is selected in theProjectswindow, then clickFinish.- The project should now be visible in the
Project Explorerlocated on the left side of the e2studio GUI.
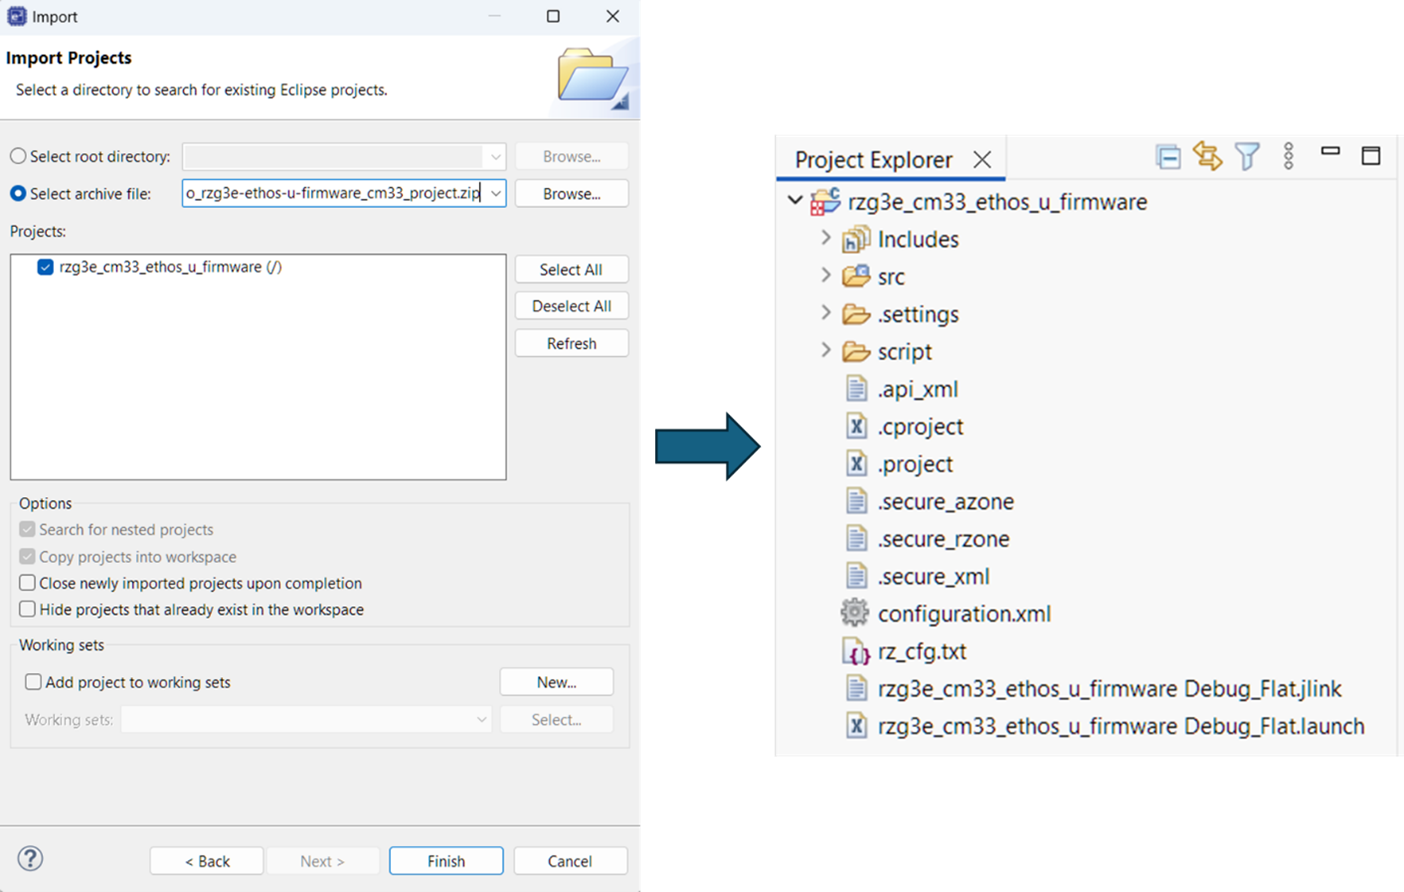
Importing Ethos-U Firmware Project In e2studio - The project should now be visible in the
Modifications To Firmware
-
Double-click the
configurations.xmlfile located in theProject Explorerview. -
In the
Stacks Configurationwindow, go to theStackstab.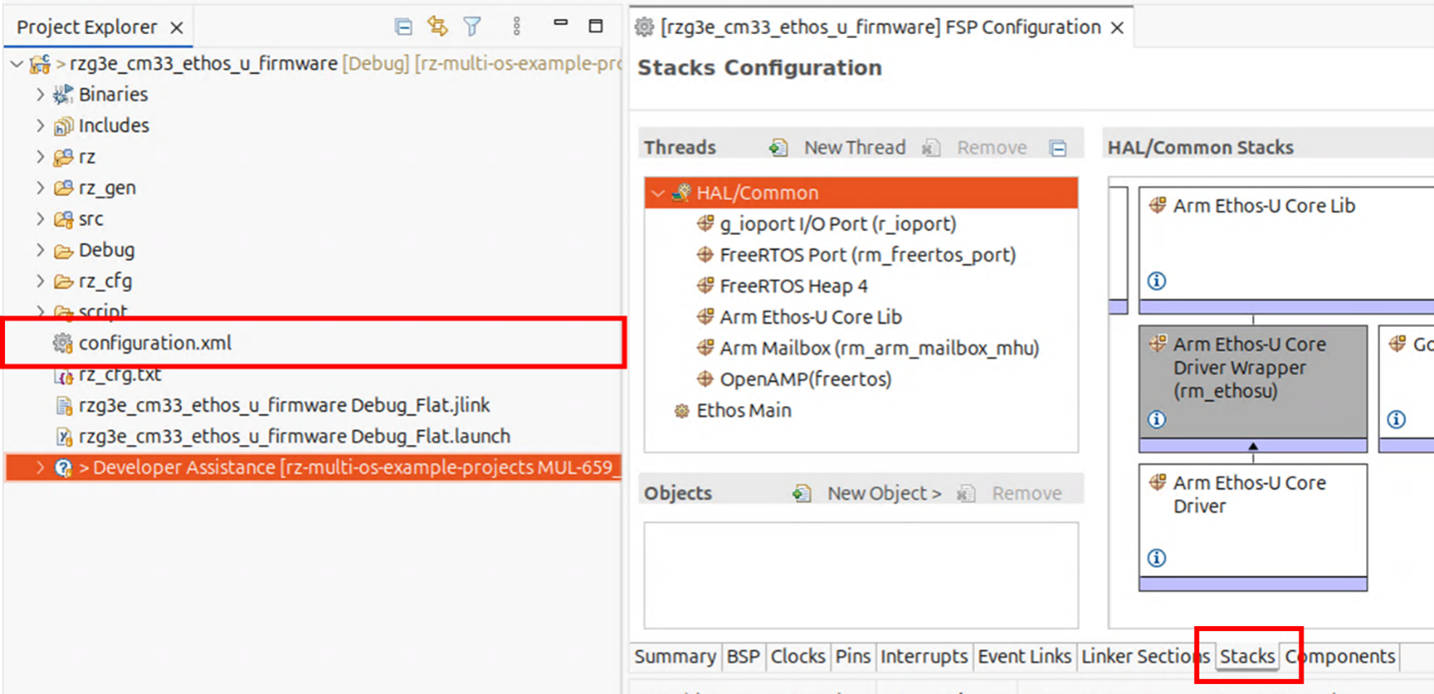
Opening Stacks Configuration In e2studio -
Locate and click the
Arm Ethos-U Core Driver Wrapper (rm_ethosu)module. -
In the
Propertieswindow, adjust the log verbosity level by clicking the value next toDebug log level.- Change from
RM_ETHOS_LOG_LEVEL_OFFto the preferred log level (e.g.RM_ETHOS_LOGL_LEVEL_DEBUG). - Once the preferred log level is selected, click
Generate Project Content.
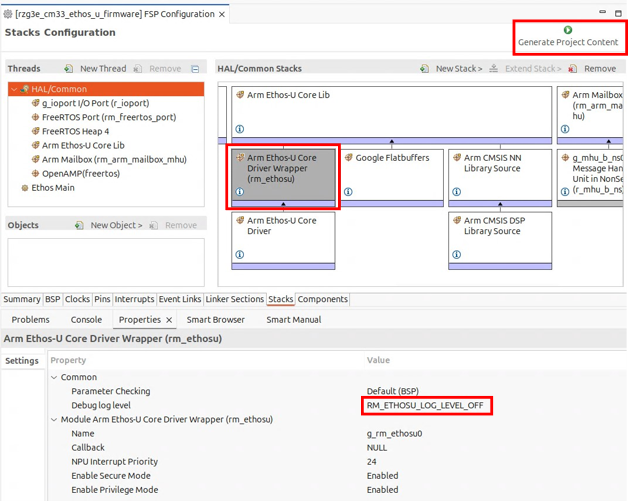
Changing Debug Log Level In e2studio - Change from
Build Procedure
-
Right-click the project in the
Project Explorerview and selectBuild Project. -
Once the build is completed, messages like the ones seen in the image below will appear in the
consolewindow.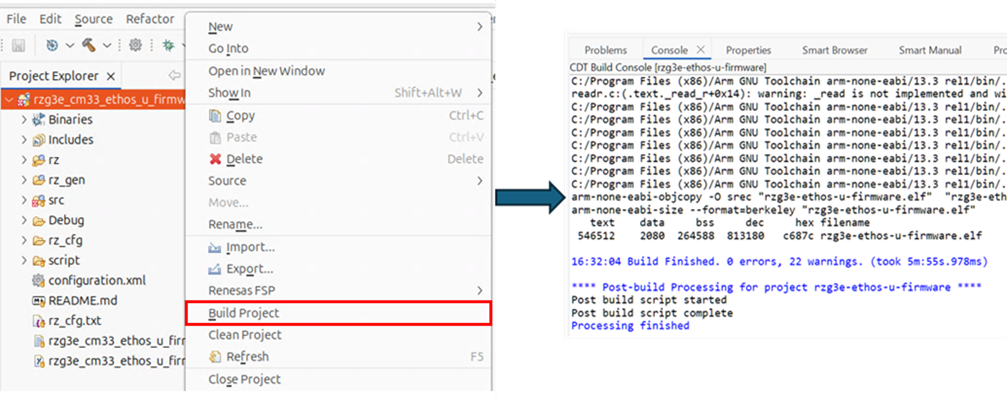
Build Firmware In e2studio -
The built firmware file
rzg3e-ethos-u-firmware.elfis generated in theDebugfolder.
Deploying Firmware
To deploy the built Ethos-U firmware onto the Linux rootfs, follow the steps below.
-
Power OFF the board if it is currently on.
-
Remove the SD Card from the board and connect it to Linux Host PC.
-
Copy the
rzg3e-ethos-u-firmware.elffile from Windows PC to the home directory on the Linux Host PC. -
On the Linux Host PC, navigate to the SD Card's root directory.
-
Copy the firmware file to the
/lib/firmware/directory on the SD Card. -
Make sure all of the data has been written to the SD Card.
-
Eject and remove the SD Card from Linux Host PC.
-
Connect the formatted SD Card to the uSD0 slot on the RZ/G3E.
-
Finally, power ON on the board to load the updated firmware.
-
Power OFF the board if it is currently on.
-
Copy the
rzg3e-ethos-u-firmware.elffile from Windows PC to the home directory on the Linux Host PC. -
On Linux Host PC, navigate to the TFTP or NFS root directory.
-
Copy the firmware file to the
/lib/firmwaredirectory with that path. -
Finally, power ON on the board to load the updated firmware.
Viewing Logs
Once the updated firmware is deployed, the logs can be viewed from the boards serial console using the following command:
This will print the logs stored in the remoteproc buffer. Example log after boot-up:
[0.000] Info: Starting the Ethos-U firmware...
[0.002] Info: Initializing NPU: base_address=0x49c80000, fast_memory=0x0, fast_memory_size=0, secure=1, privileged=1
[0.003] Info: Soft reset NPU
[0.005] Info: New NPU driver registered (handle: 0x0x80089248, NPU: 0x0x49c80000)
[0.005] Info: Initializing the Ethos-U remoteproc...
[0.007] Debug [remoteproc.cpp:init:124]:
[0.008] Debug [remoteproc.cpp:RProc:66]: setting up resource table
[0.010] Debug [remoteproc.cpp:RProc:67]: rsc_addr=0x80087B90, tableSize=233
[0.012] Debug [remoteproc.cpp:RProc:74]: setting up vdev
[0.013] Debug [remoteproc.cpp:RProc:81]: creating notify task
[0.015] Debug [remoteproc.cpp:notifyTask:110]: Starting message notify task
[0.016] Info: Initializing the Ethos-U Message Handler...
[0.018] Debug [remoteproc.cpp:notify:158]: