This page explains how to use RZ/V2H AI Applications Demo on the RZ/V2H Evaluation Board Kit.
Supported version: RZ/V2H AI SDK v4.00
Overview
This page explains how to setup the RZ/V2H Evaluation Board Kit (EVK) using the demo binary file.
Unlike the procedure described in Getting Started, this page does not build the AI Software Development Kit (AI SDK) environment, so you can easily try running the AI Applications.
In this guide, you will be able to learn followings.
Prepare microSD card to set up operating environment
Run AI Applications on the board
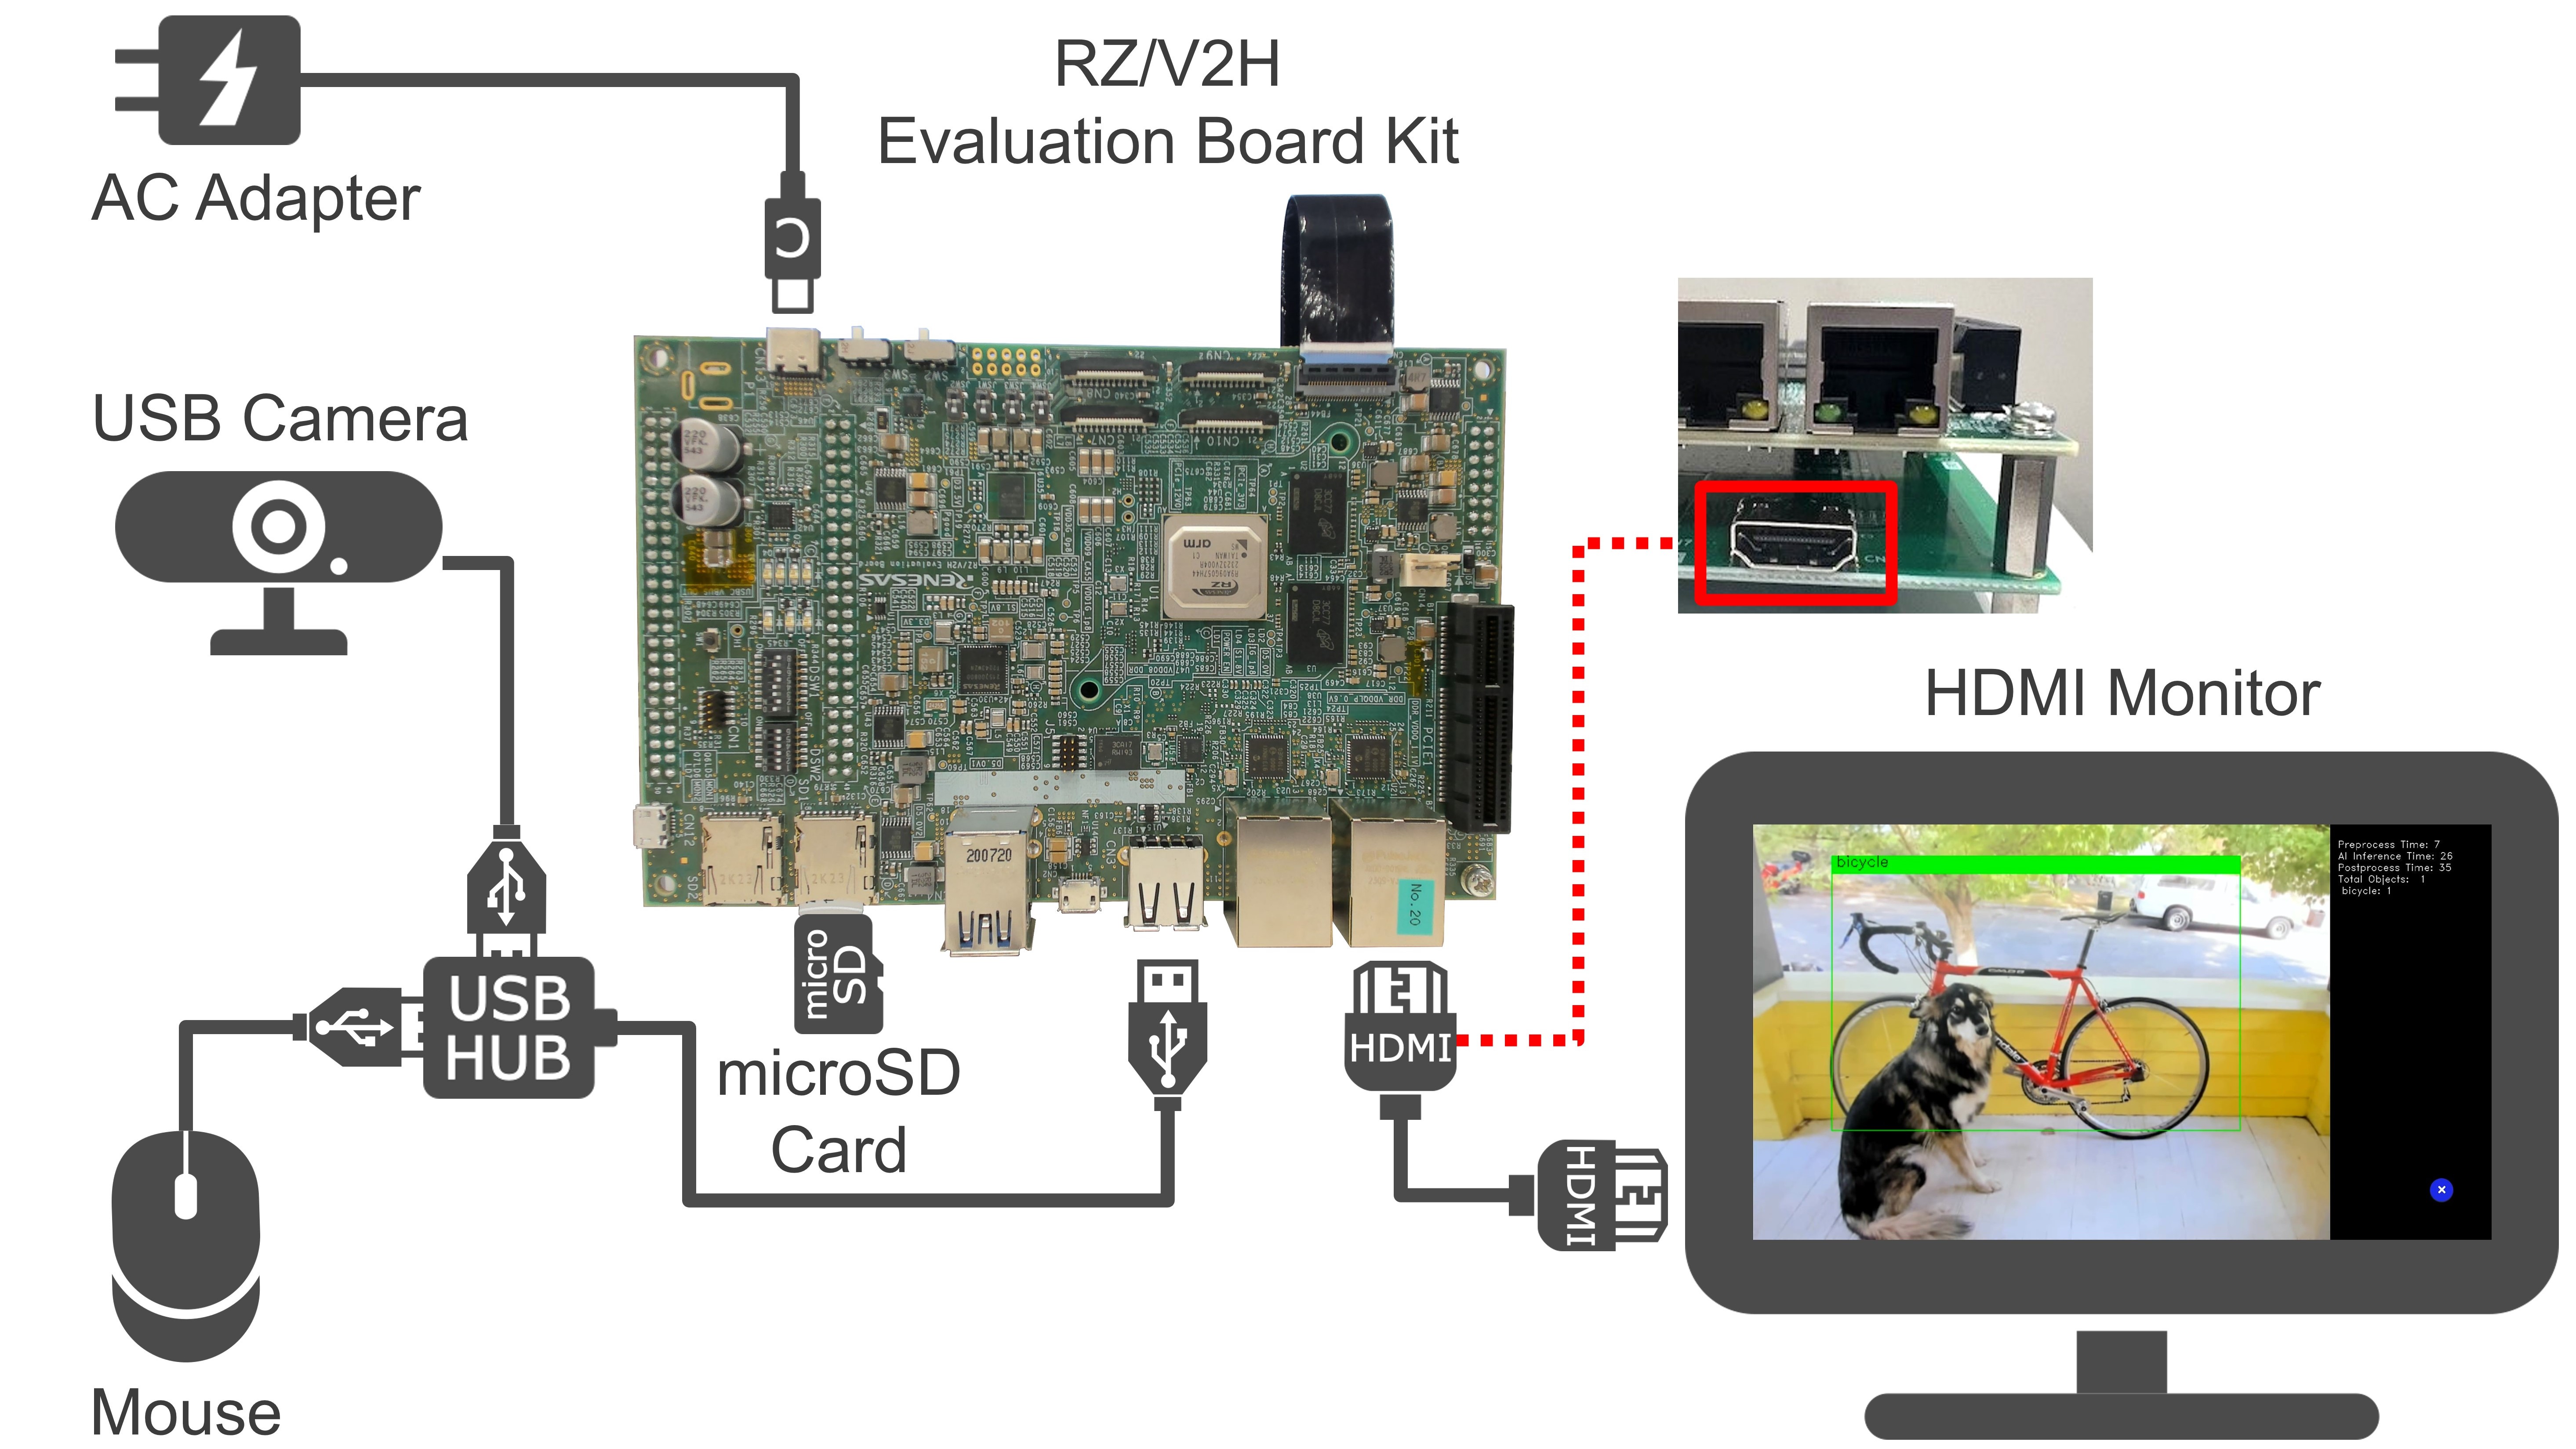
The goal of this guide is to run the application and display the captured data with AI inference results on an HDMI monitor as shown below.
Please prepare the following equipments for your EVK.
Equipment
Details
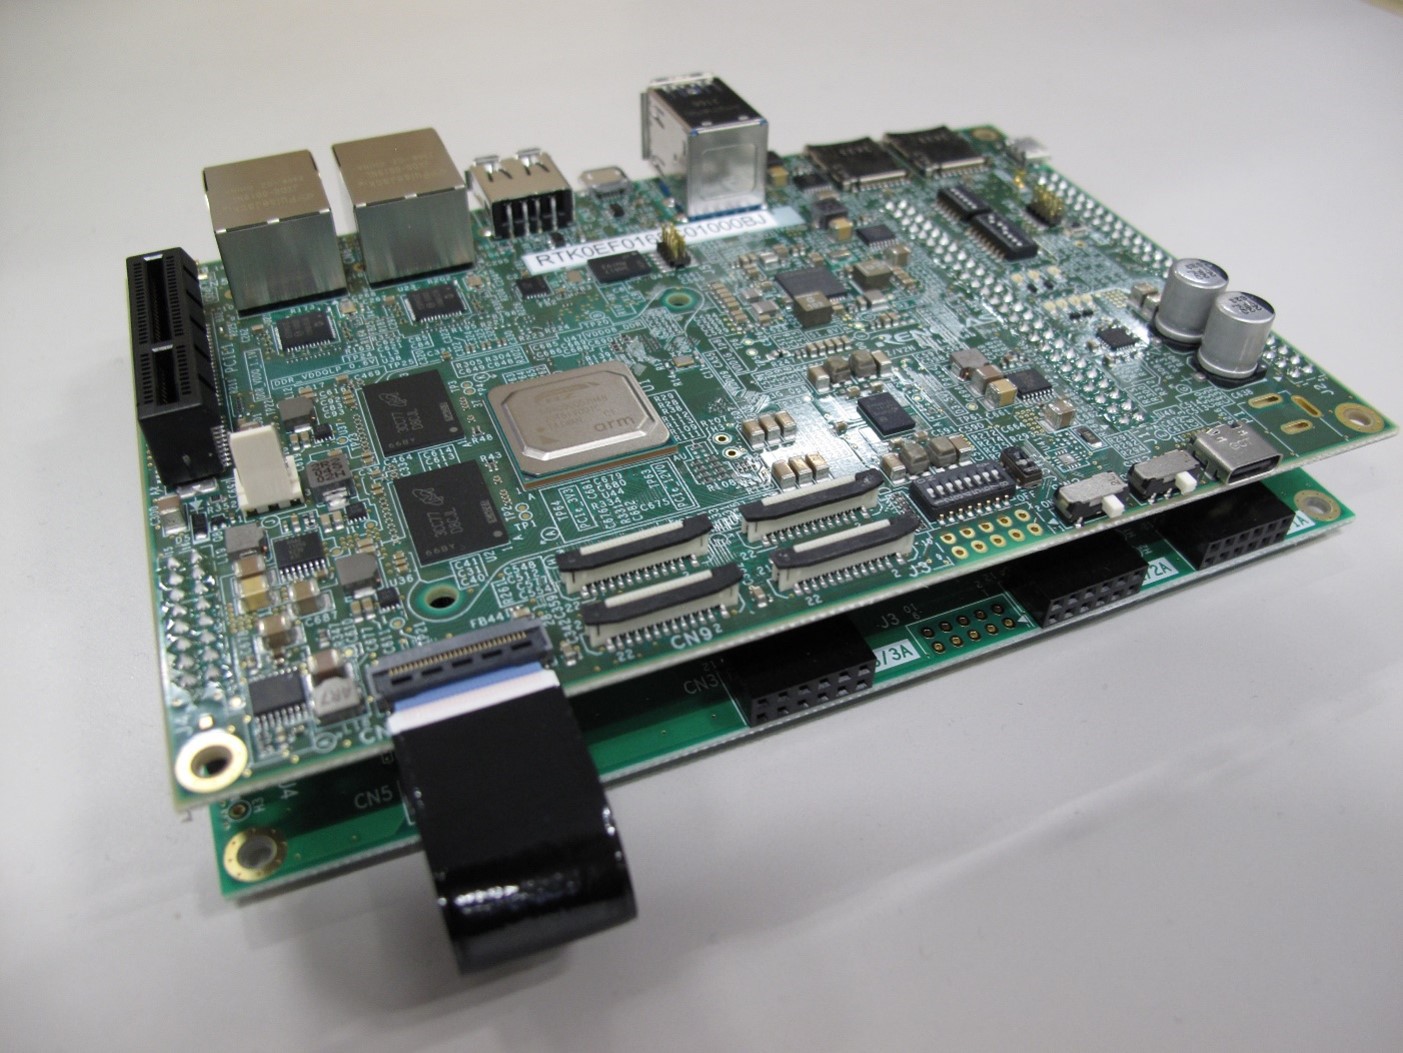
RZ/V2H EVK
Evaluation Board Kit for RZ/V2H.
AC Adapter
USB Power Delivery adapter for the board power supply.
100W is required.
HDMI Cable
Used to connect the HDMI Monitor and the board.
RZ/V2H EVK has HDMI port.
USB Camera
Since RZ/V2H EVK does not include camera module, this will be the standard camera input source.
Supported resolution: 640x480
Supported format: 'YUYV' (YUYV 4:2:2)
USB Cable Type-C
Connect AC adapter and the board.
HDMI Monitor
Used to display the graphics of the board.
microSD card
Must have over 16GB capacity of blank space.
Operating Environment: Transcend UHS-I microSD 300S 16GB
Linux PC
Used for Setup microSD card.
Operating Environment: Ubuntu 20.04
SD card reader
Used for setting up microSD card.
USB Hub
Used to connect USB Camera and USB Mouse to the board.
USB Mouse
Used to operate the mouse on the screen of board.
Step 2: Demo file extraction to microSD card
If you have not yet obtained the demo file, click on the link below to download it.
Note 2
In this section, we use a Linux PC to prepare the microSD card.
If you want to use a Windows PC, we have experience in writing disk images by following steps.
Extract the *.wic.gz compressed file using software such as 7-Zip.
Write the extracted disk image file to the microSD card using the applications such as:
List of Linux license information included in Demo microSD image. Copyright information is not included.
sd_image/
ai_applications_demo_v4.00.wic.gz
Gzip file containing the Demo microSD image.
ai_applications_demo_v4.00.wic.bmap
Bmap file for copying the Demo microSD images.
r11an0884ej0400-rzv2h.pdf
ReadMe document describing the contents of the Demo zip file.
To write the microSD card image, install bmap-tools on the Linux PC with the following command.
sudo apt install bmap-tools
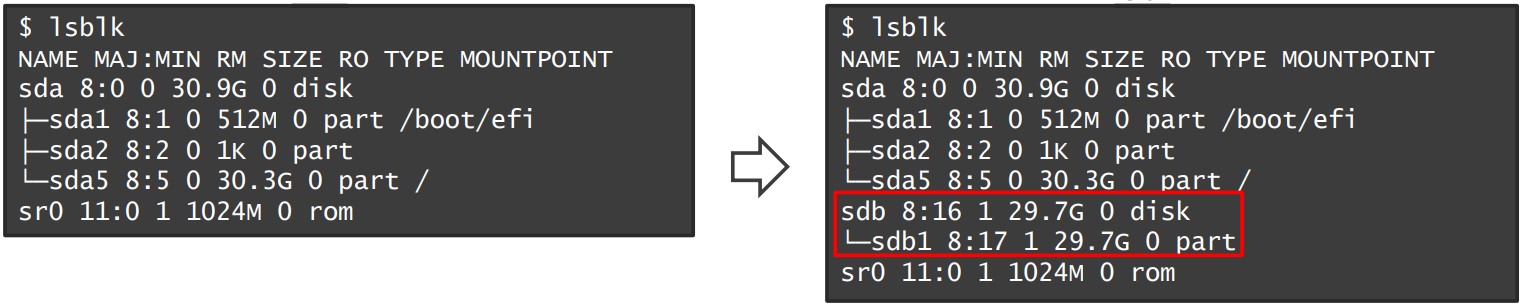
Run the following command to check the device connected to the Linux PC before inserting the microSD card.
lsblk
Then, insert the microSD card into the Linux PC and run the same command (lsblk) again.
Confirm that the microSD device name (/dev/sdb) has been added to the terminal after inserting the card, as shown in the console window below.
Note
The microSD card device name may vary depending on the PC environment. In this manual, we use /dev/sdb as the microSD card device name.
To use bmap-tools, microSD card partitions must be unmounted. Follow the steps below to unmount.
Run the following command to check the automatically mounted microSD card partitions.
df-h
Check the output and find the mount point from the device name found above (/dev/sdb).
Here "/media/user/9016-4EF8" is the mount point.
Filesystem      Size  Used Avail Use% Mounted on
:
snip
:
/dev/sdb1        15G   32K   15G   1% /media/user/9016-4EF8
Warning
Here, we use /dev/sdb as microSD card device name.
Unmount the SD card partition if it is mounted.
sudo umount /media/user/9016-4EF8
Note
If there are more than one partitions on microSD card, unmount all partitions.
Using the device name (/dev/sdb), write the disk image file into the microSD card.
cd sd_image
sudo bmaptool copy --bmap ai_applications_demo_v4.00.wic.bmap ai_applications_demo_v4.00.wic.gz /dev/sdb
Warning
Change /dev/sdb to your microSD card device name.
Note
Writing the microSD card image takes several minutes.
Execute the following command to eject the microSD card.
sudo eject /dev/sdb
Warning
Change /dev/sdb to your microSD card device name.
This completes the board setup. Let’s move on to the next chapter and run the applications.
Running Applications
This chapter describes how to run the AI Applications in the demo file.
Step 1: Boot process
Once the Preparation chapter is complete, you can boot the board in the following way.
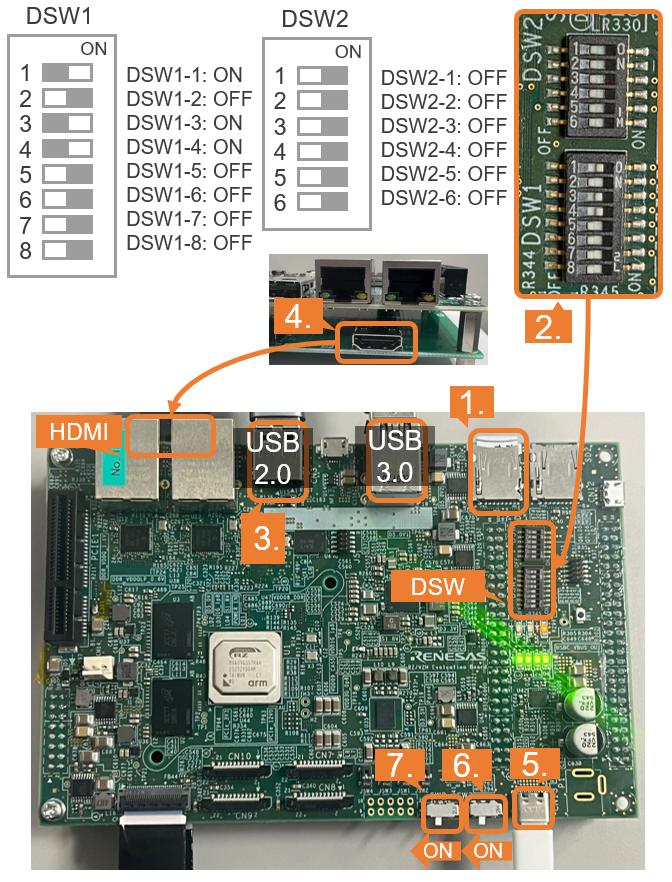
Insert the microSD card to the Board.
Note
Use the microSD card slot SD1 on the Board as shown in the figure.
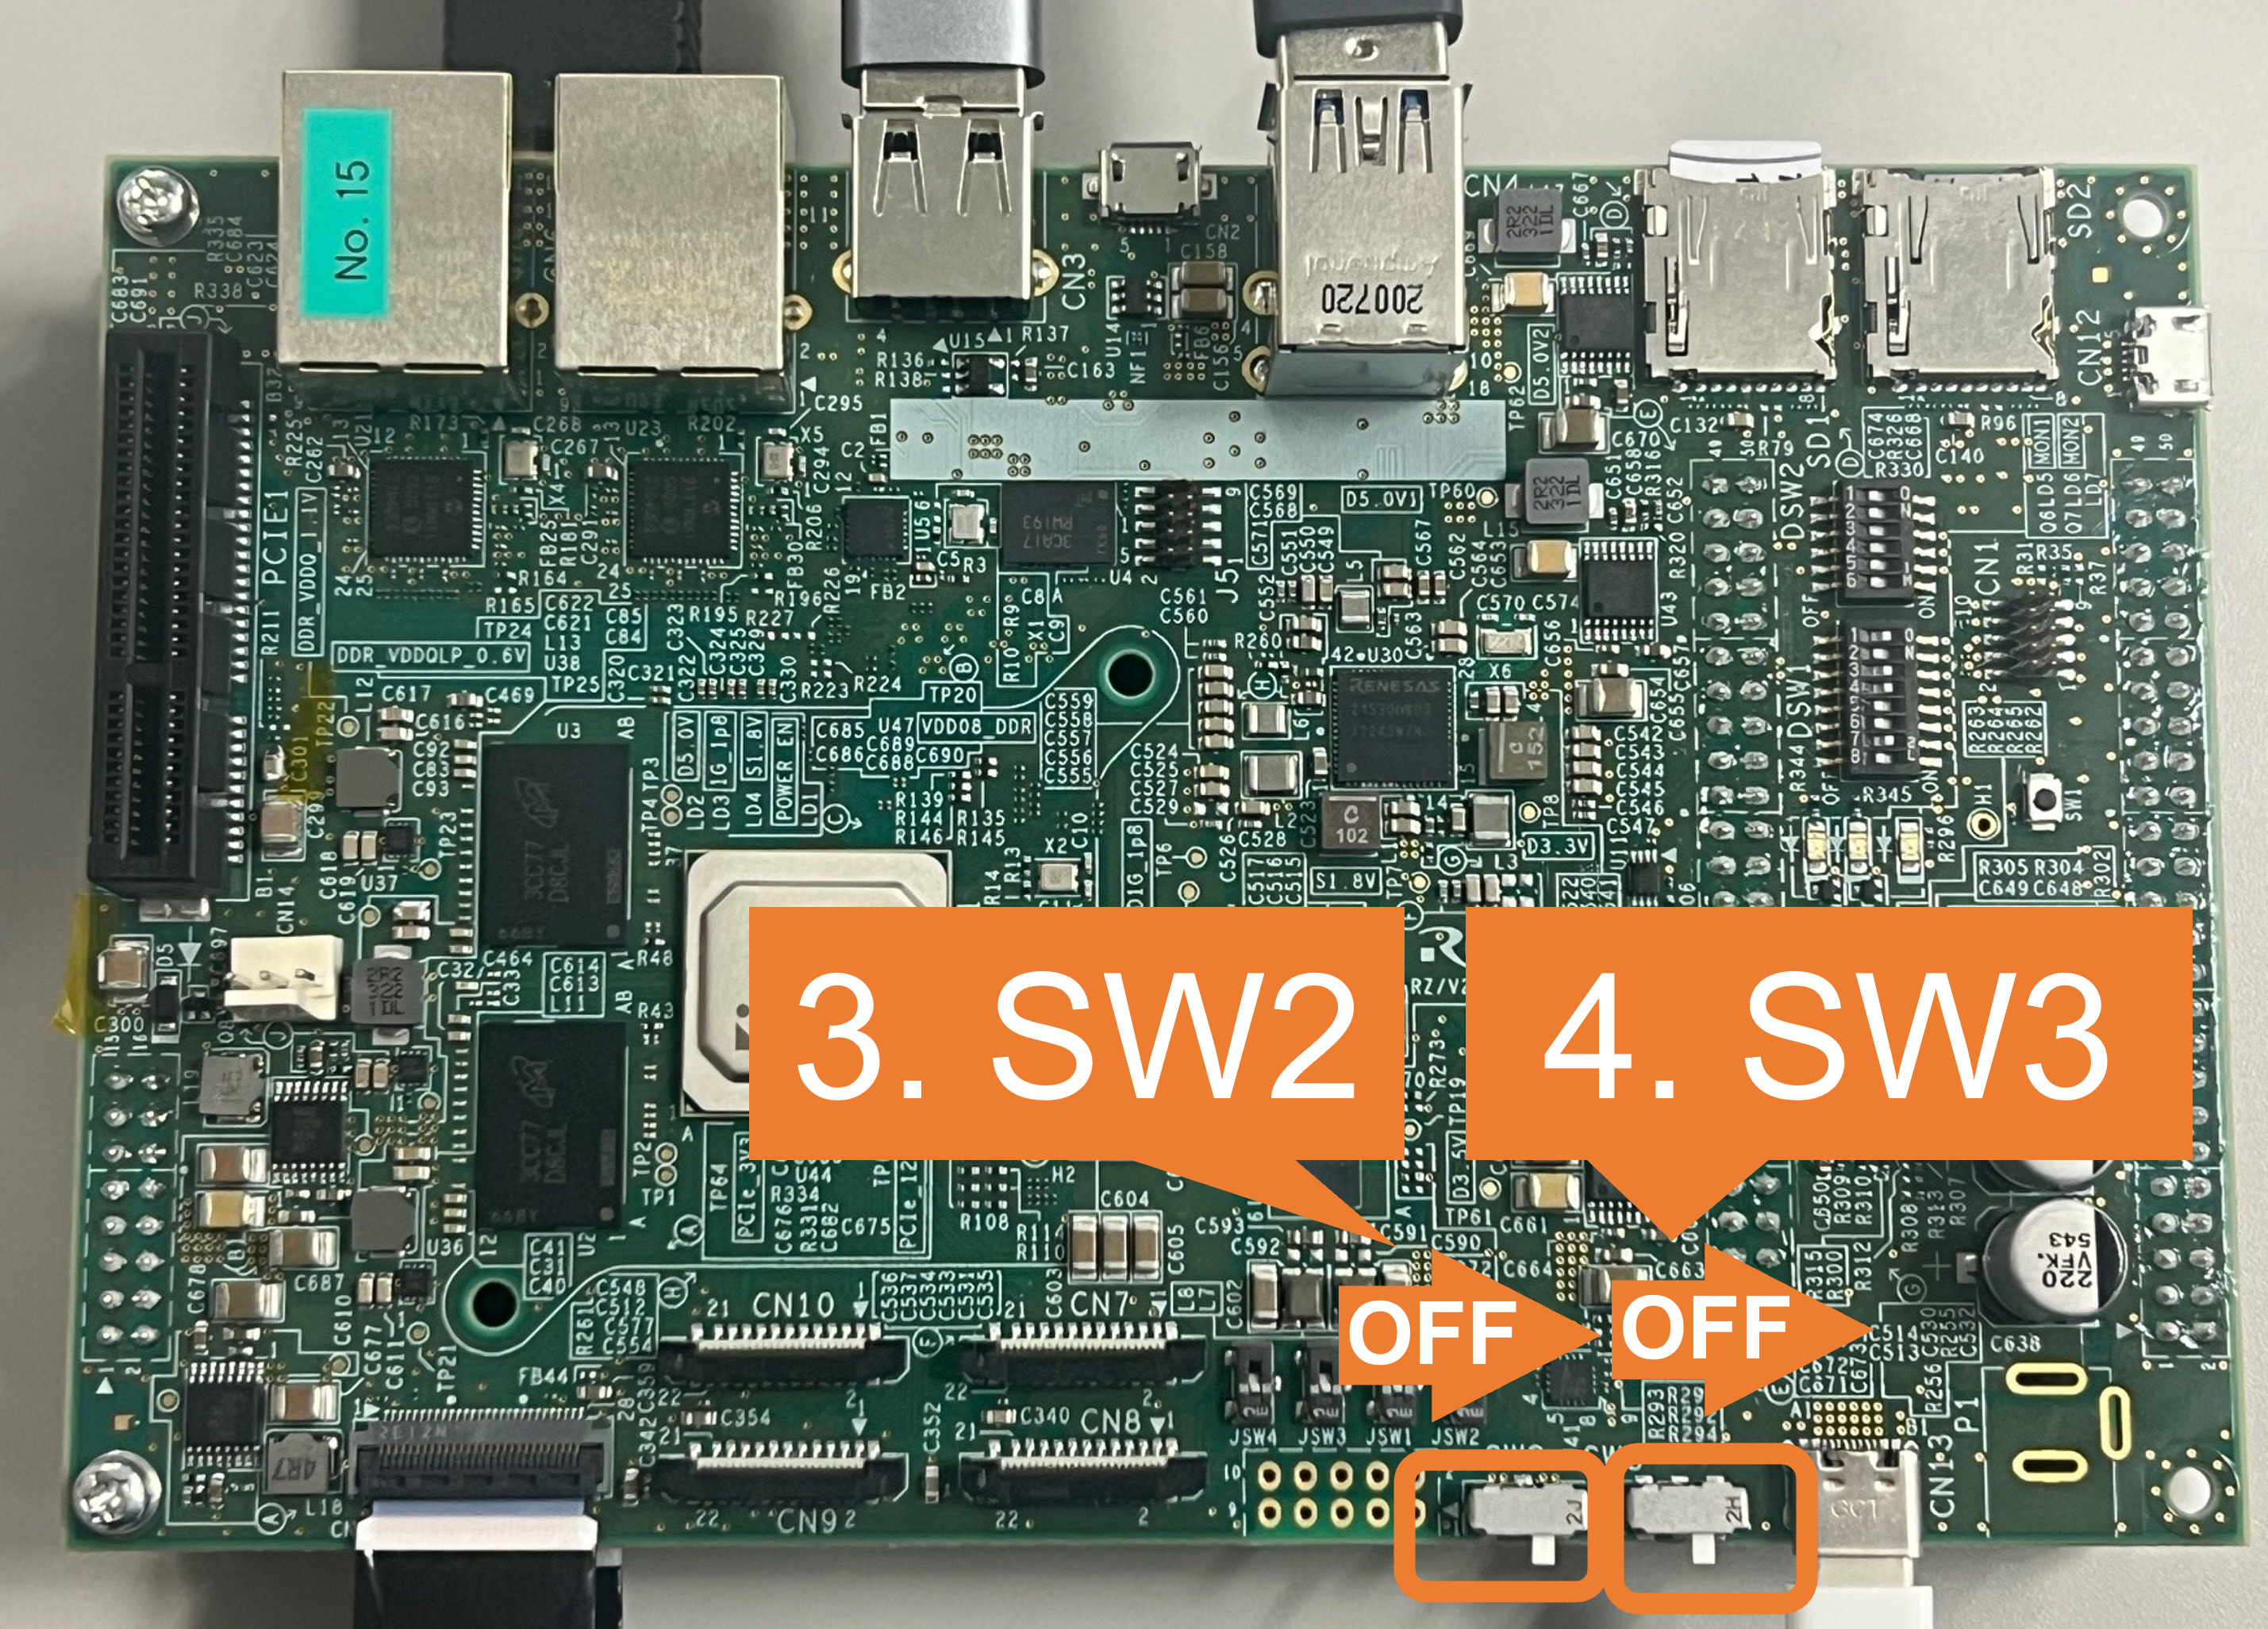
Change DSW1 and DSW2 setting as shown in the figure.
Connect the USB mouse and USB camera via USB hub.
Note
There are USB 2.0 port and USB 3.0 port on RZ/V2H EVK.
Please connect your USB camera to appropriate port according to its requirement.
Here, USB camera is connected to USB 2.0 via USB hub.
Connect the HDMI monitor to the Board.
Connect the power cable to the Board.
Turn the SW3 to ON.
Turn the SW2 to ON to power on the Board
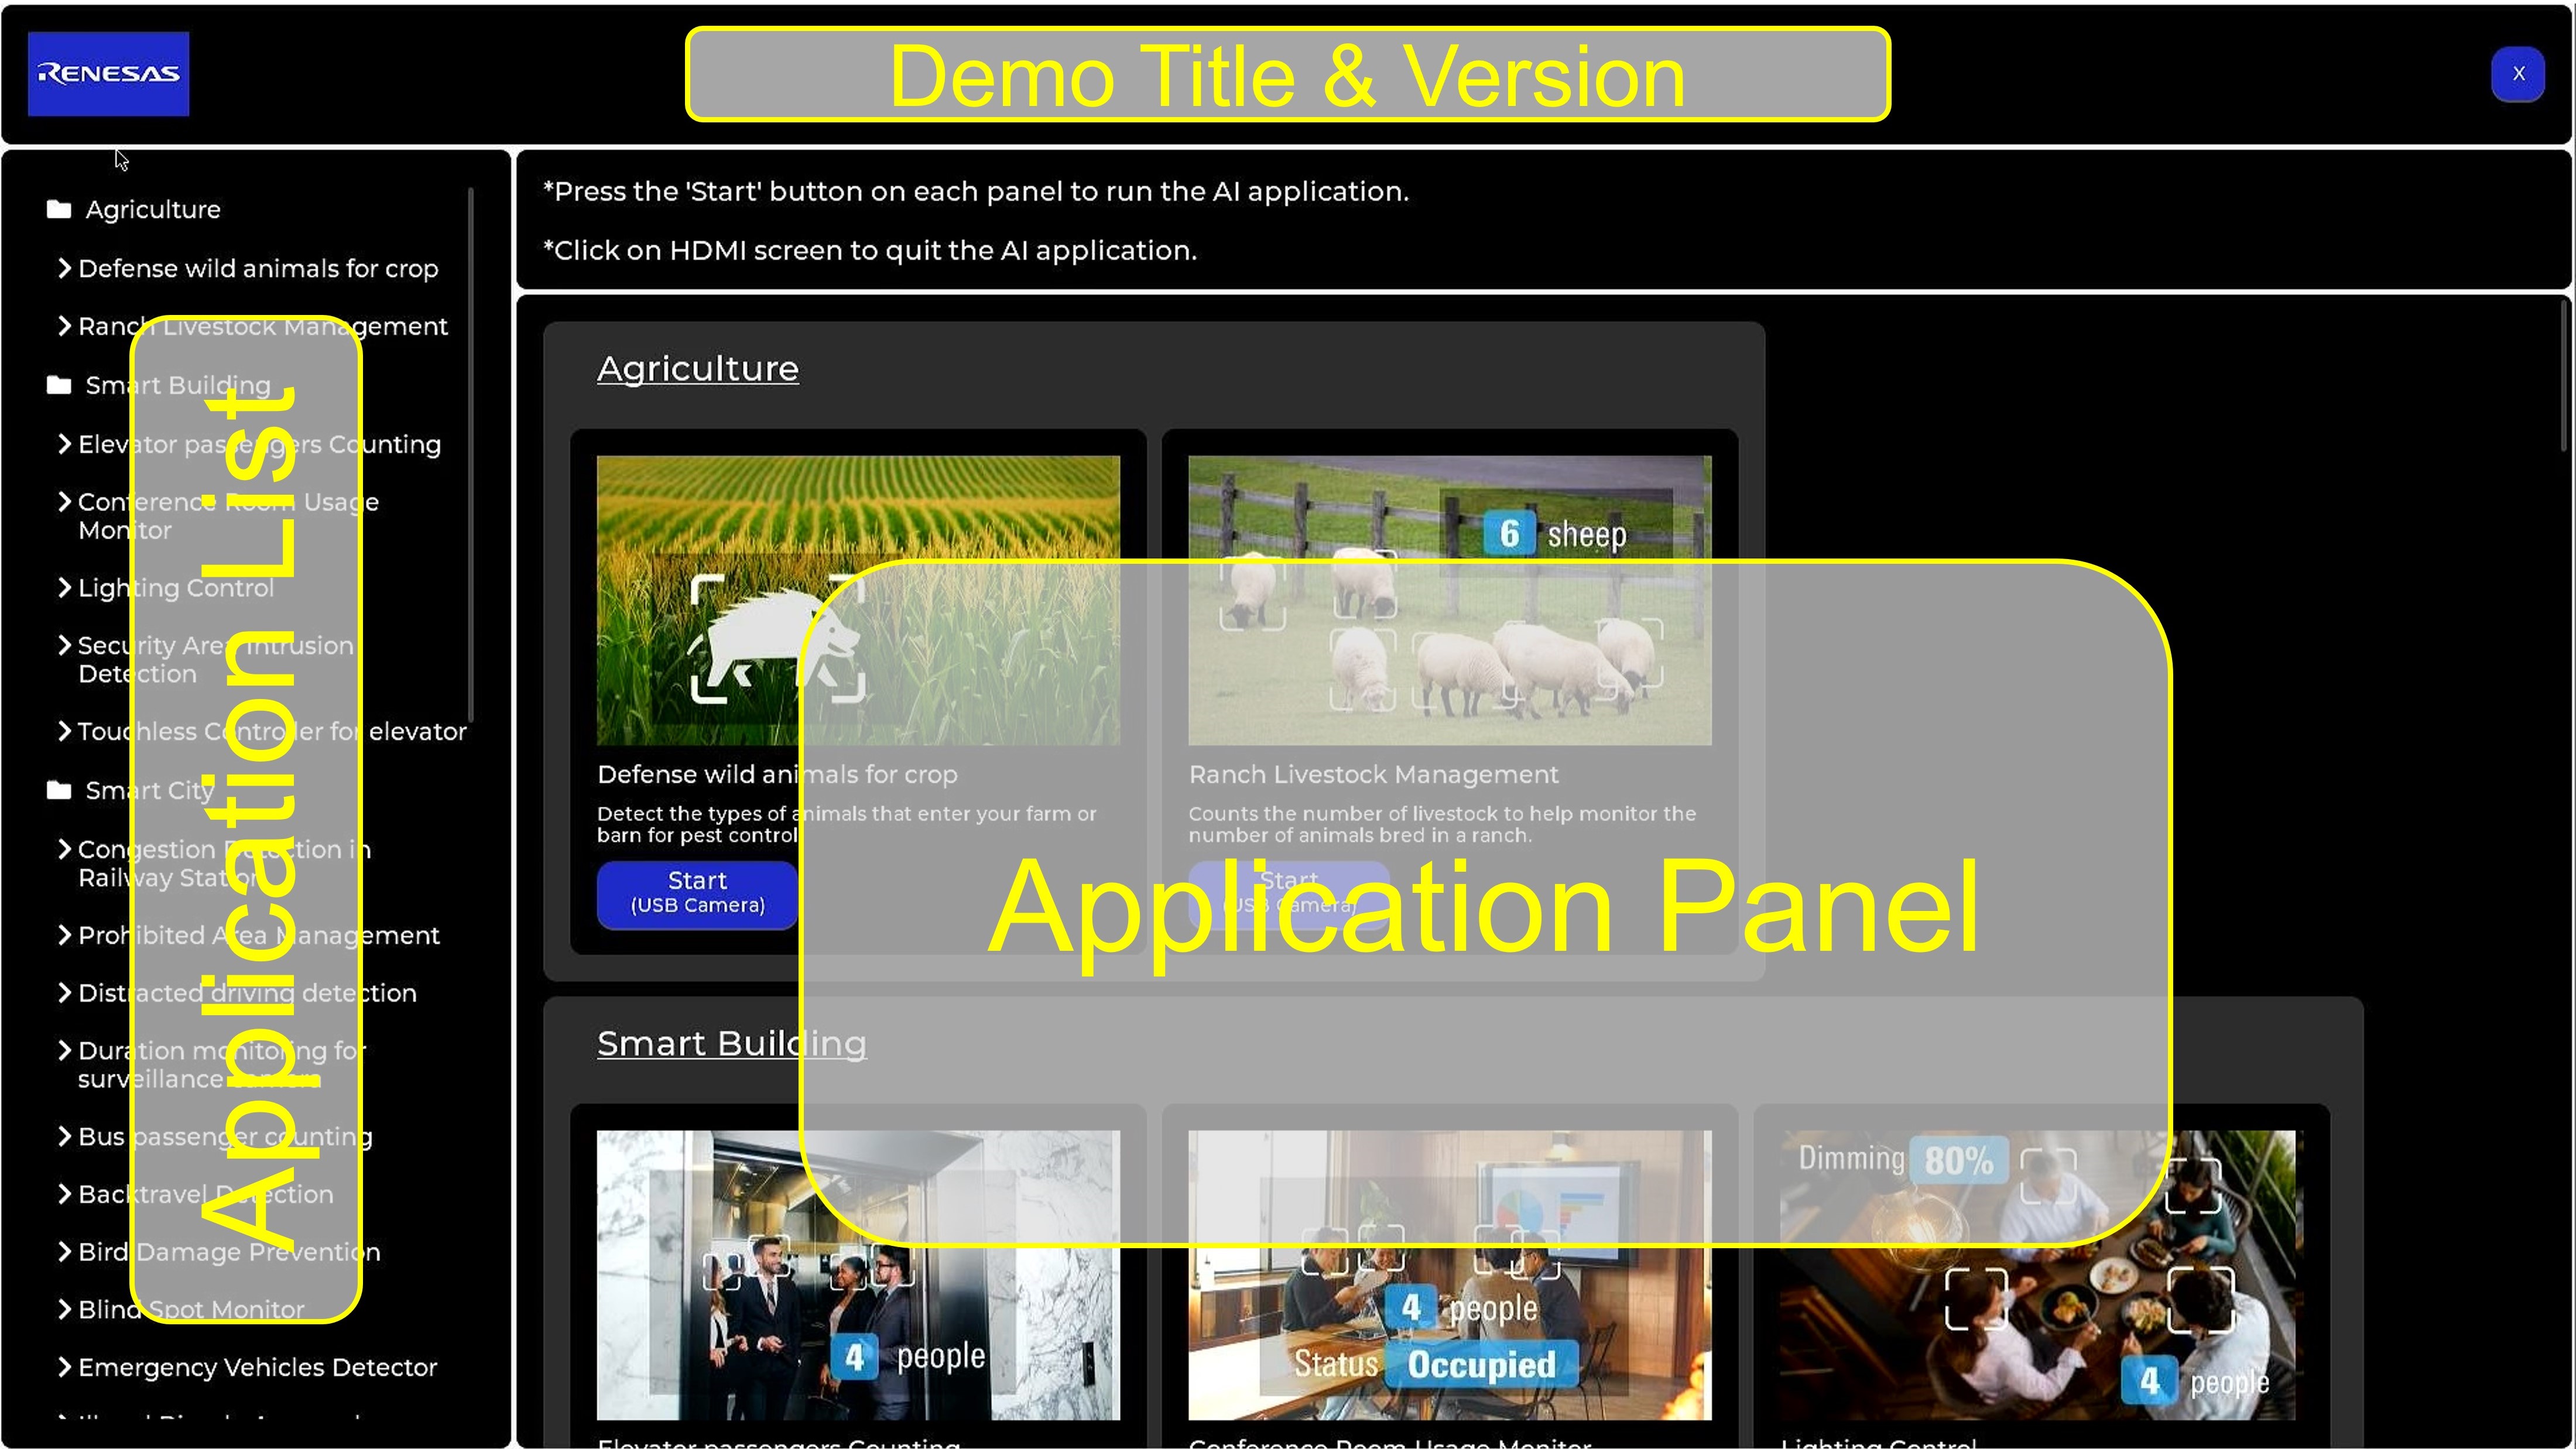
The GUI home screen shown below appears on the monitor.
The home screen consists of the following sections.
Top:
Title and Version of this Demo system.
Left:
List of names and categories of AI Applications included in the Demo.
Right:
Panels with application descriptions and run buttons.
GUI Home Screen
Step 2: Demo execution
The list of AI applications included in the Demo is shown below.
Select the application you want to run from the list.
After following the boot procedure in the previous section, you can start the application using the GUI.
Scroll the application list on the left of the screen and click the application name.
The application panel page on the right automatically shows the application that you clicked.
You can also scroll the panel page manually.
Note
If you are using a USB mouse, please drag to scroll the pages as the mouse wheel is not available.
Press the "Start" button in the panel to run the application.
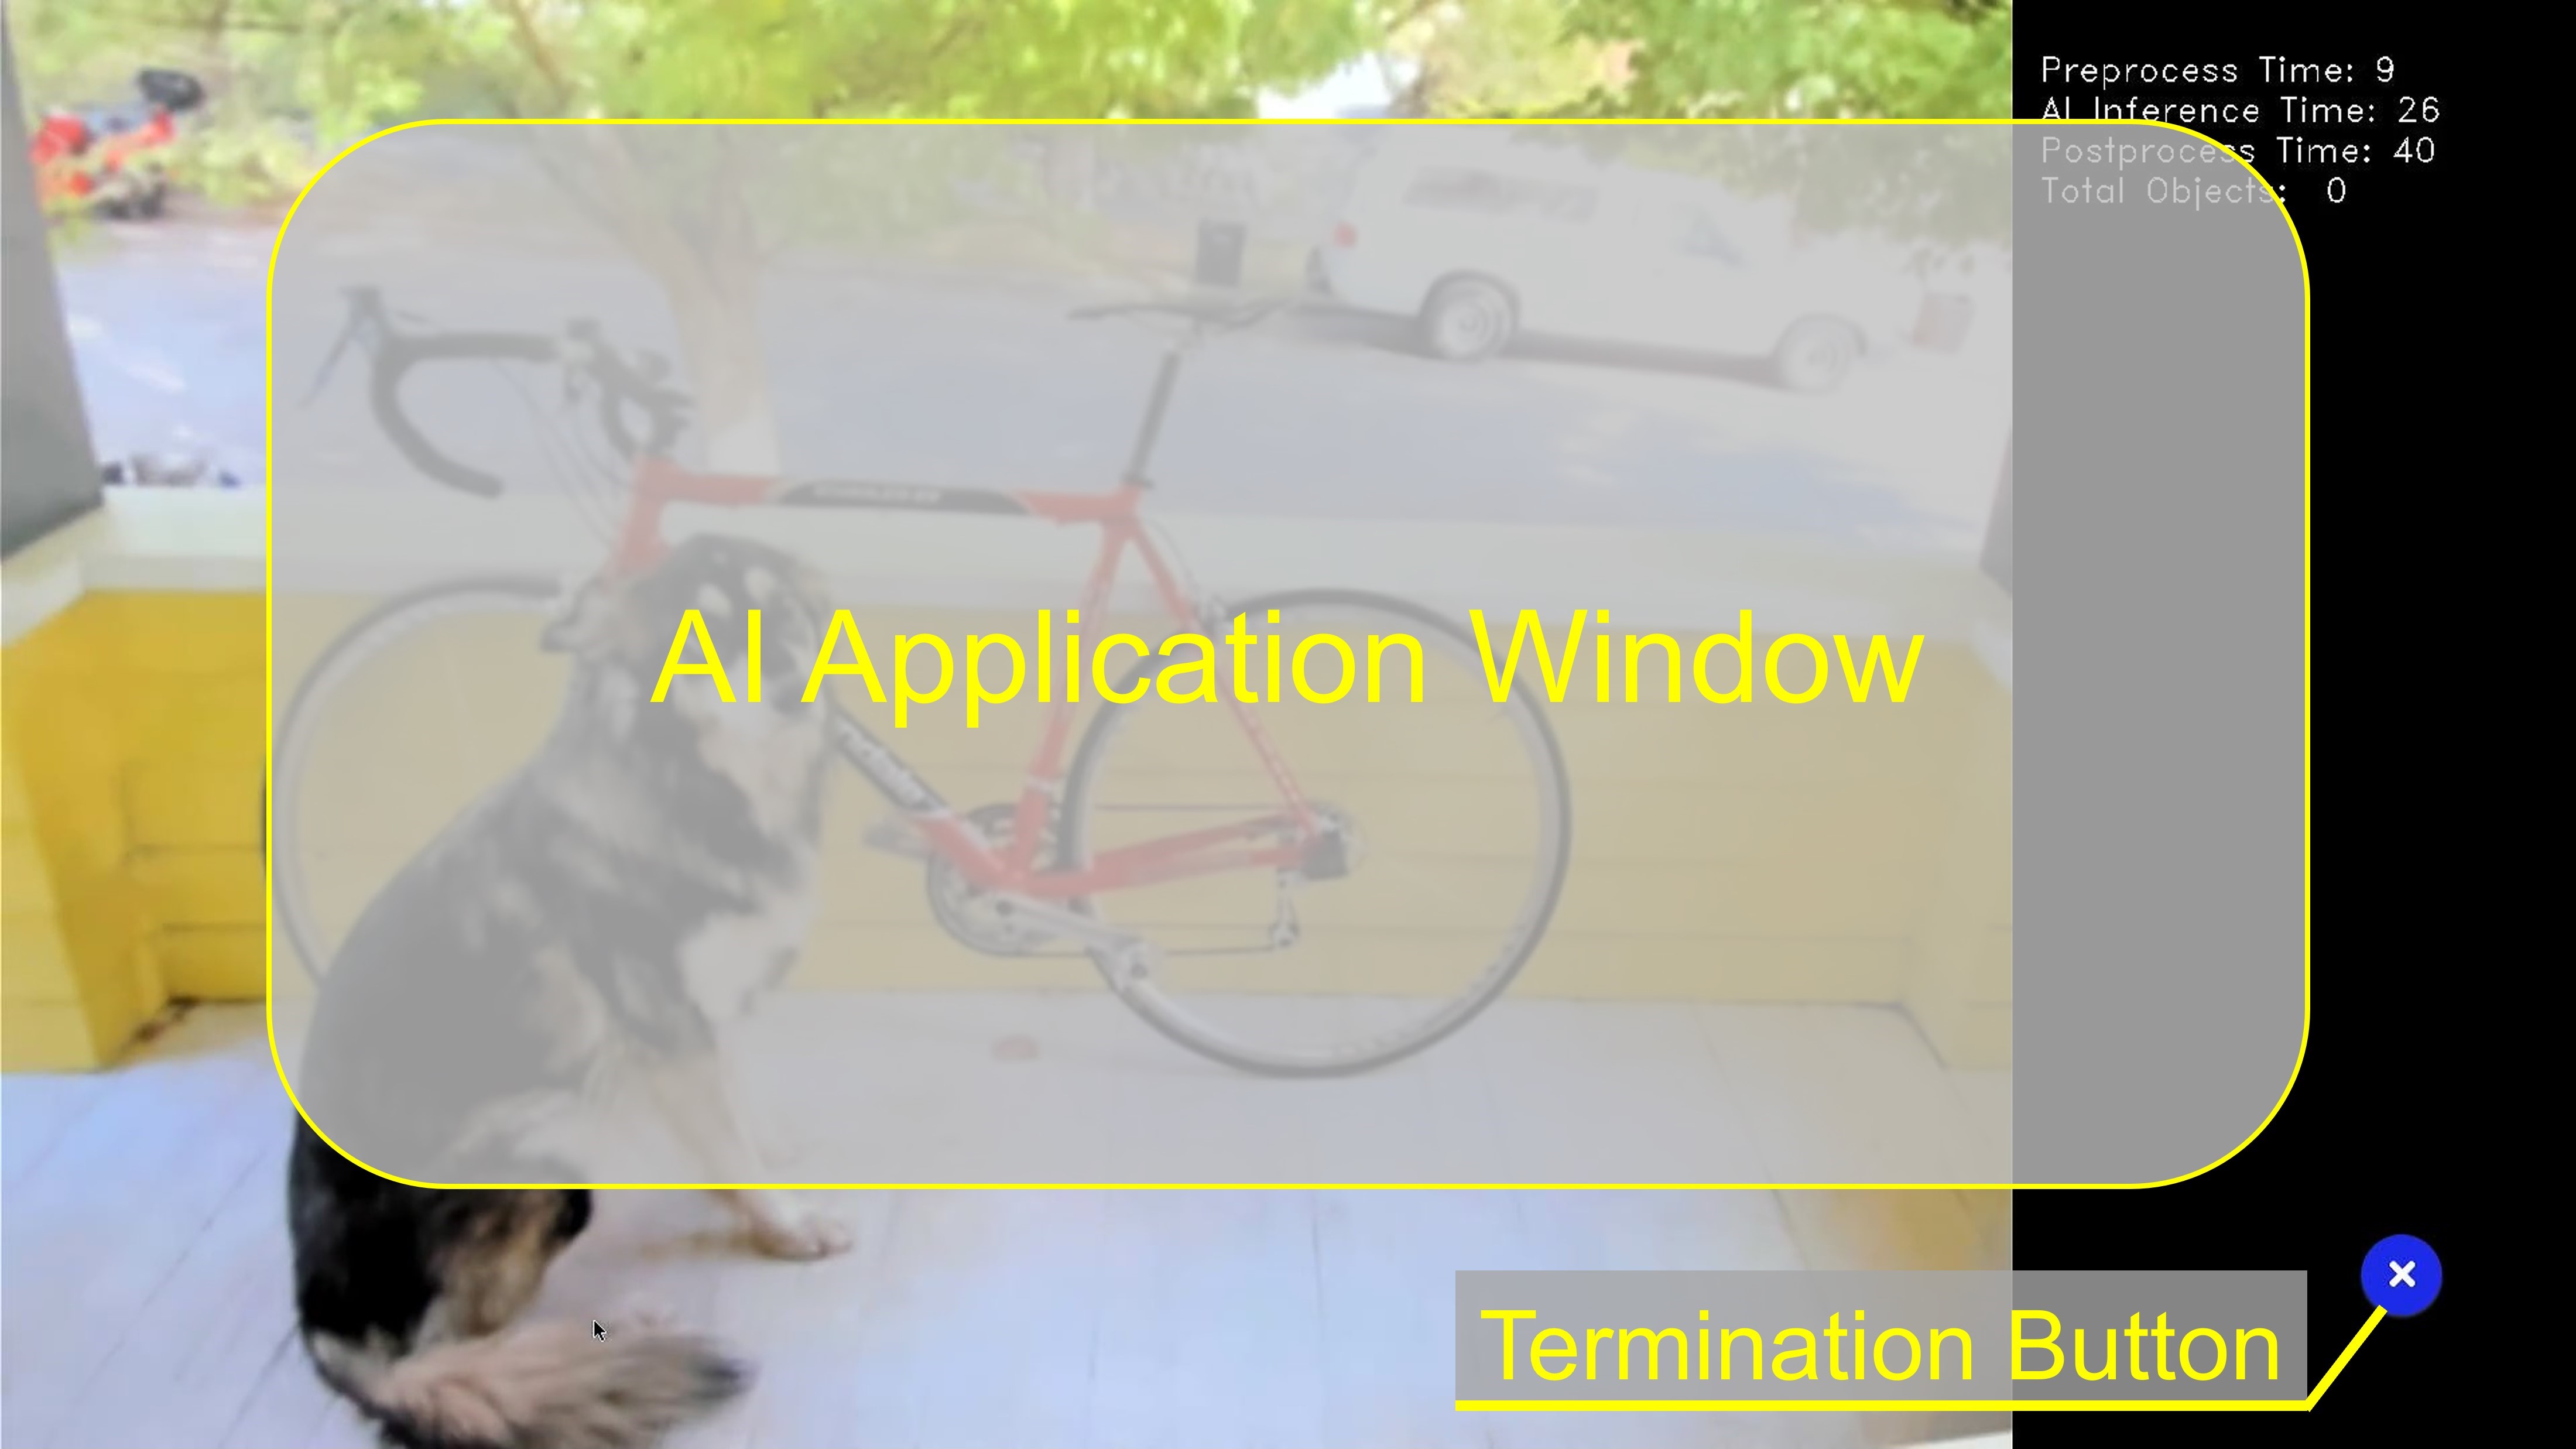
On monitor, the application will automatically start.
The application window is displayed on the screen and the termination button appears in the bottom right-hand corner.
Note1
When an application window is displayed on the screen, the termination button may temporarily disappear. However, it will soon appear again, so please wait a few seconds until the screen display gets stable.
Note2
If the running application encounters any errors (e.g. if the camera is not connected), the application will automatically exit and return to the home screen.
To terminate the application, press the blue Termination Button in the bottom right-hand corner.
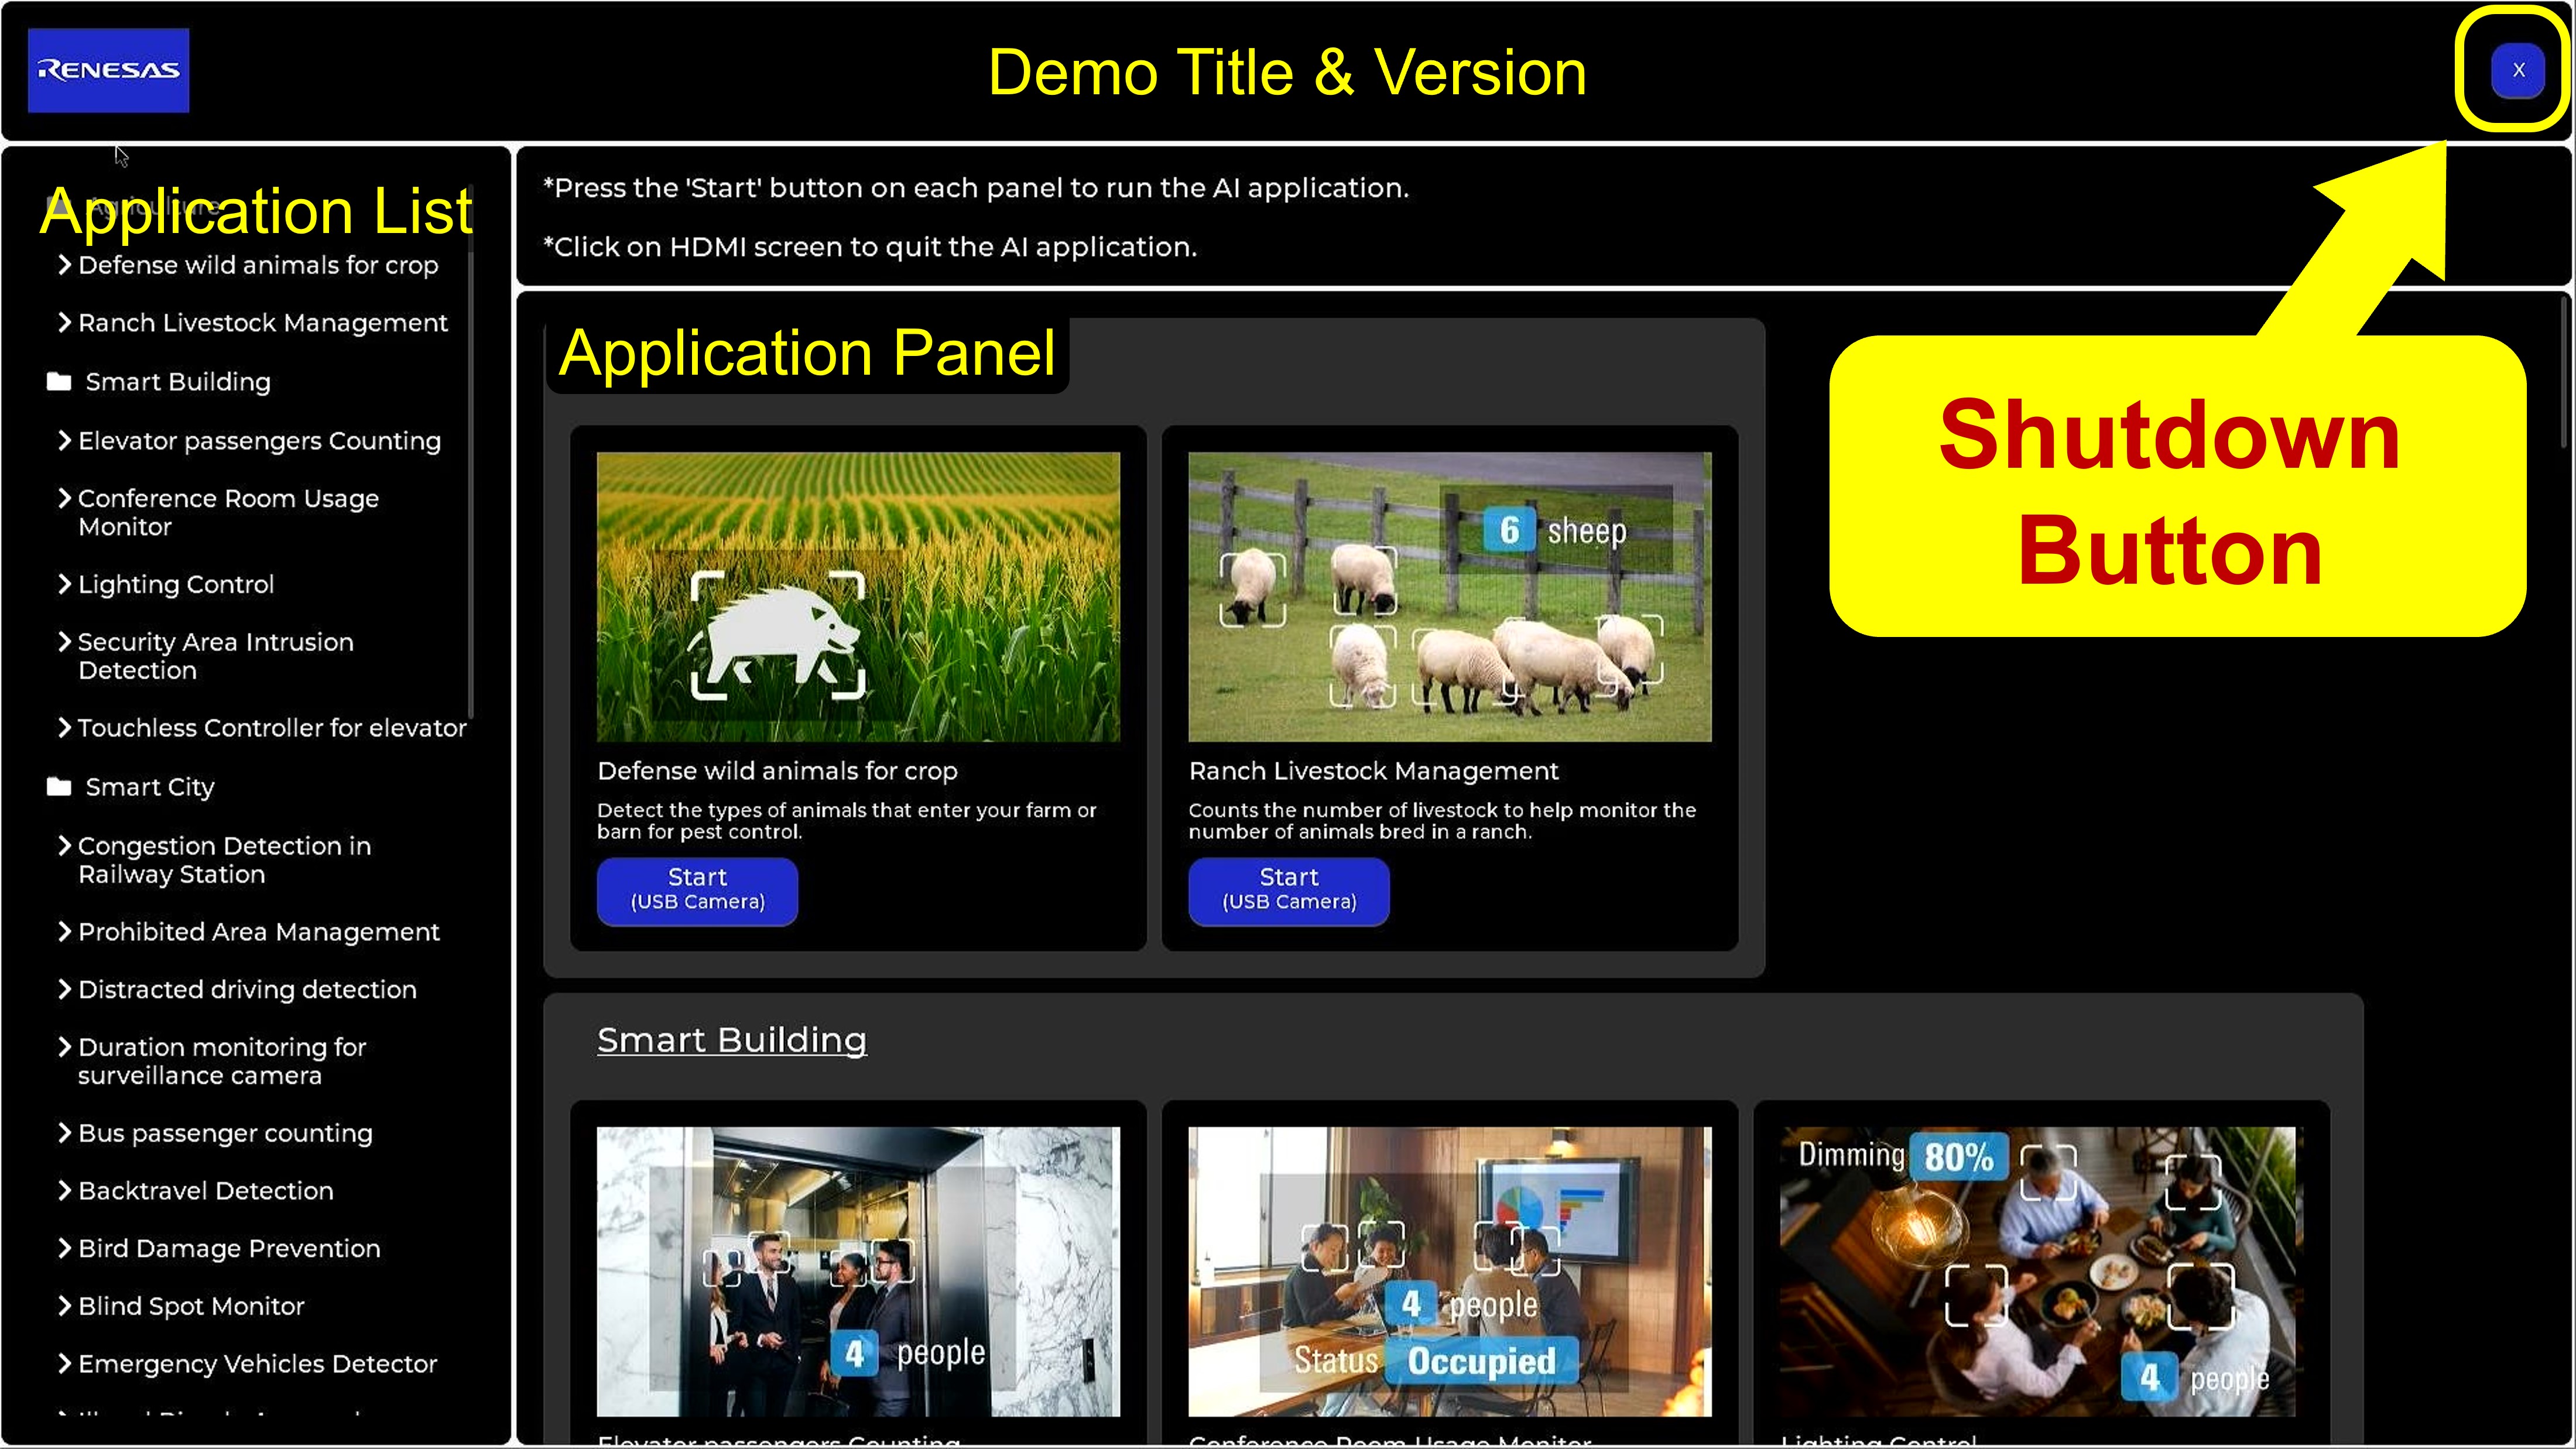
Step 3: Shutdown process
To power-off the RZ/V2H EVK, follow the procedures below.
On the home screen, click the X button at the top right-hand corner.
On board console, check that shutdown procedure runs and ends with following log.